
A few months ago, I was standing in my bedroom, staring at an old wooden dresser that had been with me for years. It was once a beautiful piece — sturdy, classic, and full of memories — but over time, the paint had faded, the handles were dull, and the wood looked tired. Honestly, I had thought about throwing it out many times, but there was something about it that I couldn’t let go of. Maybe it was nostalgia, or maybe it was just me being too sentimental.
One weekend, while scrolling through Pinterest for room makeover ideas, I came across a post about DIY furniture painting. It looked so fun and creative that I thought, why not try giving my old dresser a new life instead of buying a new one? That’s how my DIY journey began — with one old dresser and a lot of curiosity.
Step 1: The Decision and the Prep Work
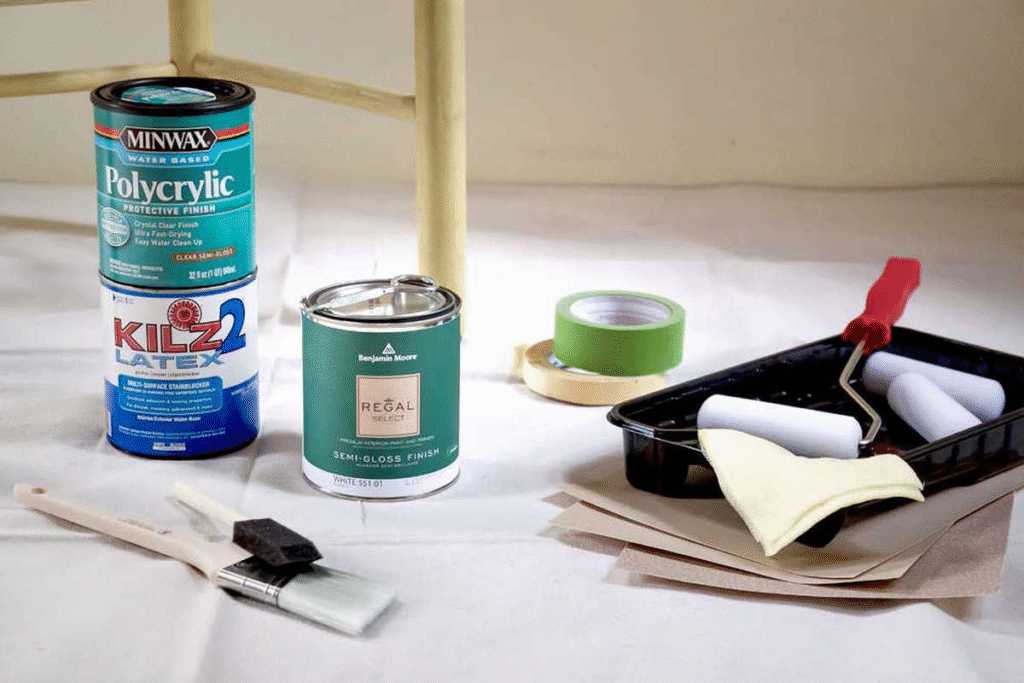
The first thing I did was move the dresser to the balcony and clean it thoroughly. There was dust, old stickers, and even a few scratches that told stories of years gone by. As I wiped it down, I realized how many memories were attached to that piece — from keeping my first skincare products to storing college notebooks.I decided to go with a soft pastel shade — something between mint green and sage — to match the calm vibe of my room. I didn’t want anything too bold, just something soothing. I bought sandpaper, primer, paint, and a couple of paintbrushes. It felt a little overwhelming at first, but once I started, it was actually relaxing.
Step 2: Sanding Away the Old
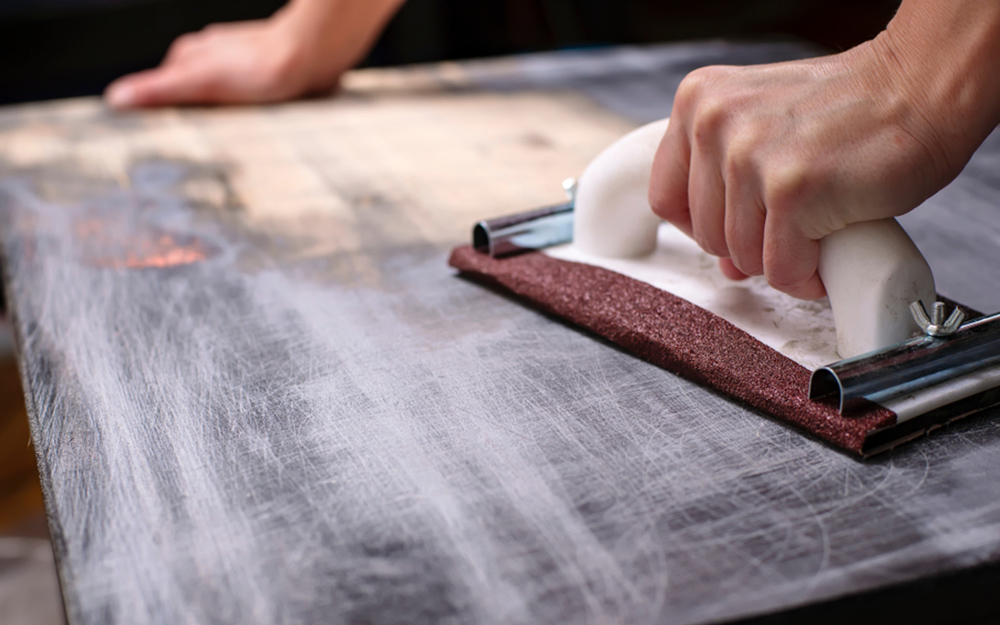
Sanding was the most satisfying part of the process. I could see the old paint peeling off slowly, layer by layer. It was messy — dust everywhere, hands covered in powder — but I didn’t mind. There was something therapeutic about it. I kept thinking about how, sometimes, life too needs a little sanding — removing old layers to make space for something new. When the surface finally felt smooth, I wiped it clean and applied the primer. I let it dry overnight and couldn’t wait to see how the next step would turn out.
Step 3: Painting the Transformation
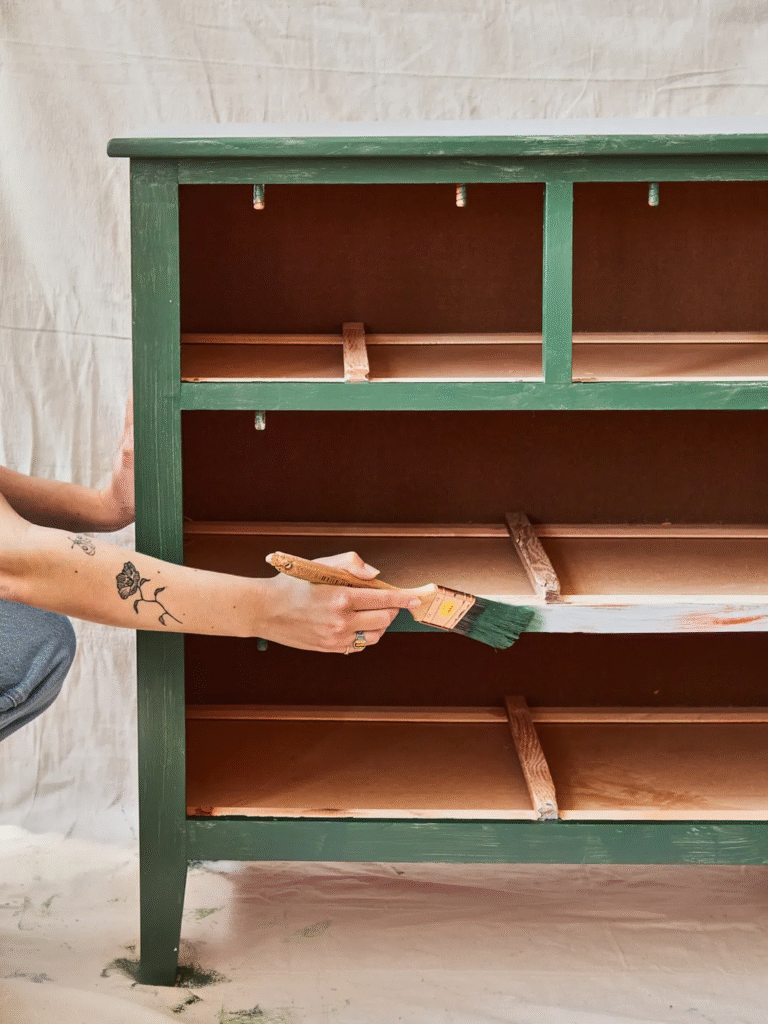
The next morning, I opened the paint can and dipped my brush in. The first stroke of pastel green on that dull brown wood felt magical. Slowly, the dresser started to change — not just in color but in personality. I applied two coats to make sure it looked even and fresh. By the second coat, my hands were covered in paint, my clothes had splatters, and my balcony looked like a creative mess — but my heart was full. That’s when I realized how satisfying it is to create something with your own hands. Every brushstroke felt personal.
Step 4: Adding Small Details

I didn’t stop at just painting. I changed the handles too — replaced the old metal ones with pretty golden knobs I found online. It added a touch of charm and modern style. I also lined the drawers with floral paper I had saved from a gift box. It was such a small thing, but it made the dresser feel brand new.Once everything was done, I stepped back and looked at my work. I couldn’t believe it was the same old dresser. It looked fresh, elegant, and full of life — just like the feeling I wanted my room to have.
Step 5: What I Learned

Repainting my old dresser wasn’t just a home project — it was a reminder that we don’t always need to buy new things to feel renewed. Sometimes, transformation comes from giving old things a little time and love. This DIY experience made me realize how calming creativity can be. I started looking around my home, wondering what else I could repaint or repurpose . It’s funny — I started with one dresser, but now, I’ve found a new hobby and a deeper appreciation for handmade decor. Whenever I walk into my room now, my eyes go straight to that pastel dresser. It feels like a reflection of me — simple, colorful, and filled with effort. It’s not perfect (there are still tiny brush marks if you look closely), but that’s what makes it mine.
Final Thoughts
If you’ve ever thought of trying DIY home decor, start with something small — maybe an old stool, a wooden frame, or a shelf. You don’t need to be a professional; you just need patience and a bit of imagination. The joy of creating something yourself is priceless. That one project not only changed how my room looks but also changed how I feel about my space. Every time I open those drawers, I feel proud — because I didn’t just repaint furniture, I repainted a little part of my creative self.
This blog is based on my personal experience with DIY home decor. The process, materials, and results shared here reflect my own journey and creativity. Readers are encouraged to try similar projects at their own pace and comfort level. Always take proper precautions while using paints, tools, and cleaning products. This post is not sponsored; all opinions are my own.
#DIYHomeDecor #HomeMakeover #RepaintProject #CreativeLiving #OldToNew #DIYFurniture #HomeDecorInspo #CushionCornerVibes #RoomMakeoverIdeas #SustainableDecor #BudgetFriendlyDIY #DecorWithLove #PastelHomeVibes #HomeStylingTips #DecorTransformation #Carrerbook#Anslation